

Photoshop Tutorial
Simple Realistic Flames
This tutorial will show you how to create some relaistic looking flames in Photoshop.
All tutorials are made in Photoshop CS4 on a Mac.
I have seen many tutorials that add a flame effect to letters and words, but not one that has the flames on it's own, so I took what I know from them to create this.
Step 1.
Create a new Photoshop document. For the purpose of this tutorial I used 300 x300. First, fill the background with Black. Next, duplicate the layer.
We will need that later. To do this, go to Layer > Duplicate Layer..., name your layer ("Background Copy"
is always good).
You can also duplicate the layer by Right clicking on the layer in the Layers window, and selecting "Duplicate Layer".
Step 2.
Create a new layer on top of the two that you have. Name this "Flames" and we are ready to go.
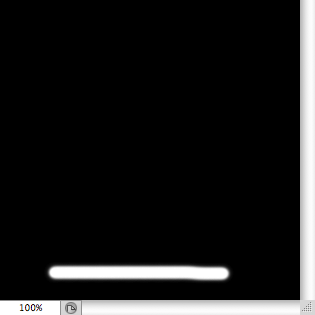
On the Flames layer, select White as the forground colour, select your Brush tool and pick a soft brush. For this I used a
15px sized brush. Now just draw a straight line along the bottom of the image. It doen't have to be perfectly straight, just don't make it too curved.
Step 3.
At this point you should have three layers, a Background, a Background copy and your Flames. Select the Flames layer, and we now need to start on the flames.
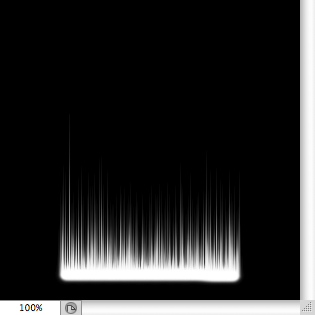
First go to Edit > Transform > Rotate 90° CW. Next, go to Filter > Stylize > Wind and
use the following settings; Method: Wind, Direction: From the Left.
Repeat this effect by either pressing cmd+F or going to Filter > Wind, it will be at the top of the list.
Now we need to set it back to it's original position, to do this just go to Edit > Transform > Rotate 90° > CCW. This will place it back as the image shown.
Step 5.
Before we go into making the lines more flame like, we need to blur the image. Go to Filter > Blur > Guassian Blur and set the
Radius to 2.5 pixels.
We need to merge the Flames layer with the one below. To do this, select the "Flames" Layer, right click then select Merge Down.
This will merge the layer with the one below.
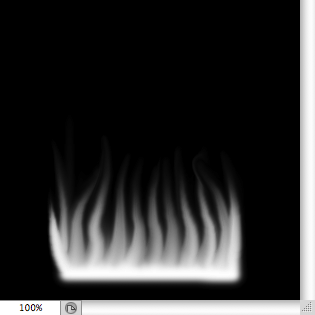
Now we use the Liquify tool, Go to Filter > Liquify, this will open a new window which you can work in. Make sure that the
Forward Warp Tool is selected (it's the top button on the left) and select a brush size that is similar to the size you used in Step 2.
Now, just start making "S" shape squiggles going up from the line. You can make them thick, thin, long, short, just go nuts.
When you are done, press OK and you will have something similar to the image shown.
Step 7.
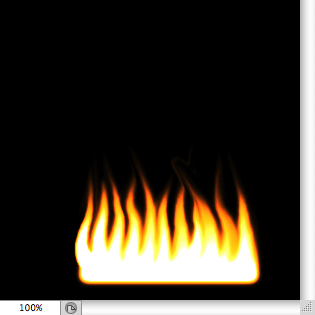
Now it's time to colour the image to make it warmer and more flame like. Go to Image > Adjustments > Hue/Saturation and use the following
settings; tick the "colorize" box, Hue: 0, Saturation: 50, Lightness: 0.
Now you will need to duplicate this layer (Layer > Duplicate Layer...). Go back into the Hue/Saturation (Image > Adjustments > Hue/Saturation) and this time use these settings; Hue: 0, Saturation: +50, Lightness: 0. Do Not tick the "colorize" box. Press OK and change the blending Mode of the layer to Overlay and Merge Down with the layer below (right click then select Merge Down).
Once more. Duplicate the layer (Layer > Duplicate Layer...), and go back into Hue/Saturation, (Image >
Adjustments > Hue/Saturation). This time use theses settings; tick the "colorize" box, Hue: 55,
Saturation: 80, Lightness: 0.
Change the Blending Mode of this layer to Linear Dodge (Add) and merge down once more (right click then select
Merge Down).
If you have followed correctly, you should have something that looks like this image shown. You can now add this to any image you want like this.
All tutorials are made in Photoshop CS4 on a Mac.